|
(Note: this is the 8th post about this adventure I started in January 2022. If you enjoy this post, you might want to start at the beginning!) The thing about exploring new ideas – my rabbit hole – is that you never know where it is going to lead. I was enjoying painting flowers on Yupo with my stencils. I entered some in FCA juried shows and had them accepted. The feedback was very positive and some sold, which is the best compliment that someone can give your work - taking it home with them. The birds haven’t been entered in any shows yet but it will be their turn soon. But this work was all fairly small. The largest was 10x10. I was limited by the size of stencil that I could cut with my Cricut and by the size of the Gelli plate I had. The small scale was starting to chafe. Just about this time, I ran into Carney Oudendag at Grizzli Winery during the switch over from the Ode to Spring show and the Grizzli Gallery Show. Carney is one of my favourite artists. She works with mixed media and creates the most amazing paintings! We chatted about stencils and Gelli printing. She mentioned that she had made her own gel plate. She also mentioned printing on tissue and deli paper. It was like a light bulb went off! Printing on tissue!!! That could open up all sorts of possibilities and new burrows to explore in my rabbit hole! I started printing on tissue paper. You have to be reasonably quick to make the impression and get the tissue off before it gets too sticky. I then tried applying the tissue print to both paper and canvas. It works just like a layer of paint. The tissue kind of vanishes, leaving just the acrylic. I realized that I could create multiple stencils that connected together. I could print them on tissue and apply them to a larger canvas! It is like I poked my head up out of the rabbit hole and found myself in canvas land with all sorts of possibilities ahead! As long as I can print and join the tissue well, I could make just about any size of artwork. The freedom from a limited number of fixed and small sizes felt just great. My first project with multiple connected stencils was a tree (I mean, really, did you expect something else!!). This is what the 4 stencils look like put together. Each stencil is 10x10 and each took 3 to 4 hours of work in Photoshop to create. 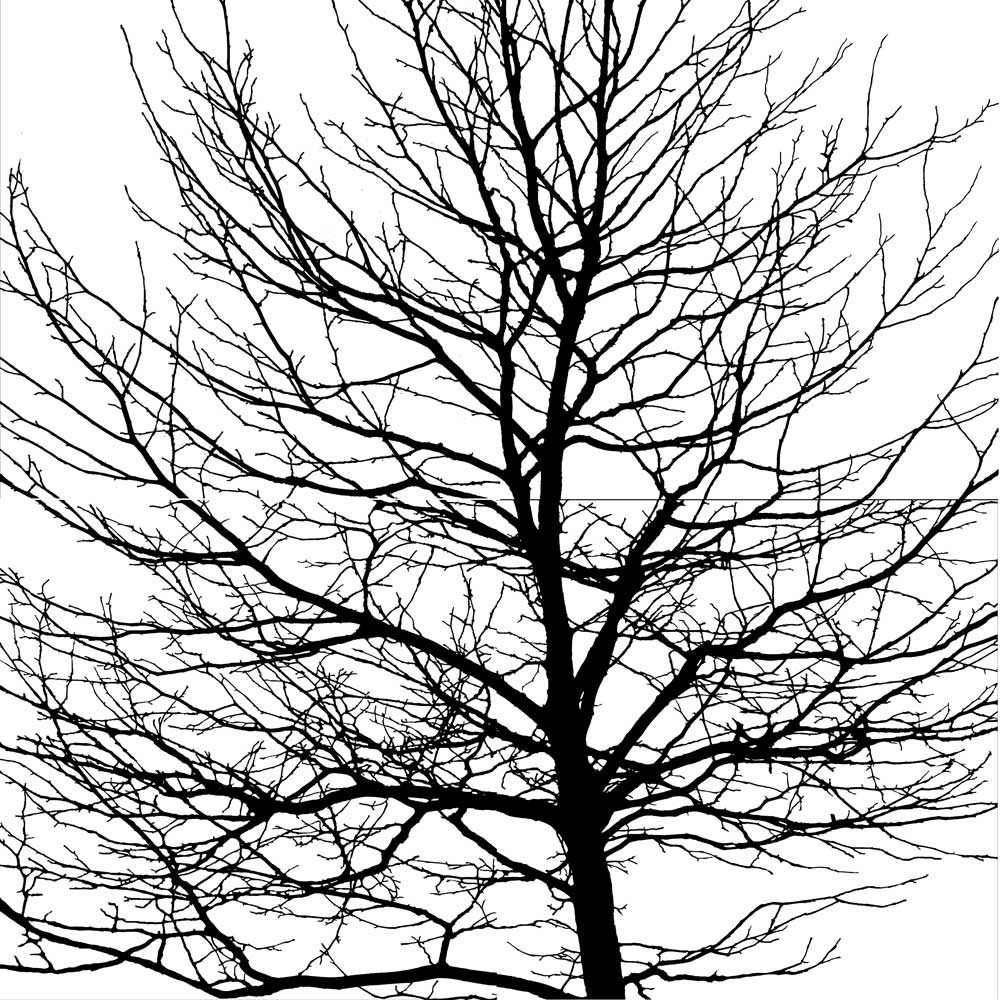 And here is how I created a 16x16 painting with them: Step 1 - Underpainting of the canvas. I followed the image of the four stencils and putting in colour in Nichol Azo Yellow, Quin Gold and Anthraquinone Blue. I dampened the canvas to start and then used fluid acrylics, dropping it directly onto the canvas and brushing it out with a 2-inch brush. 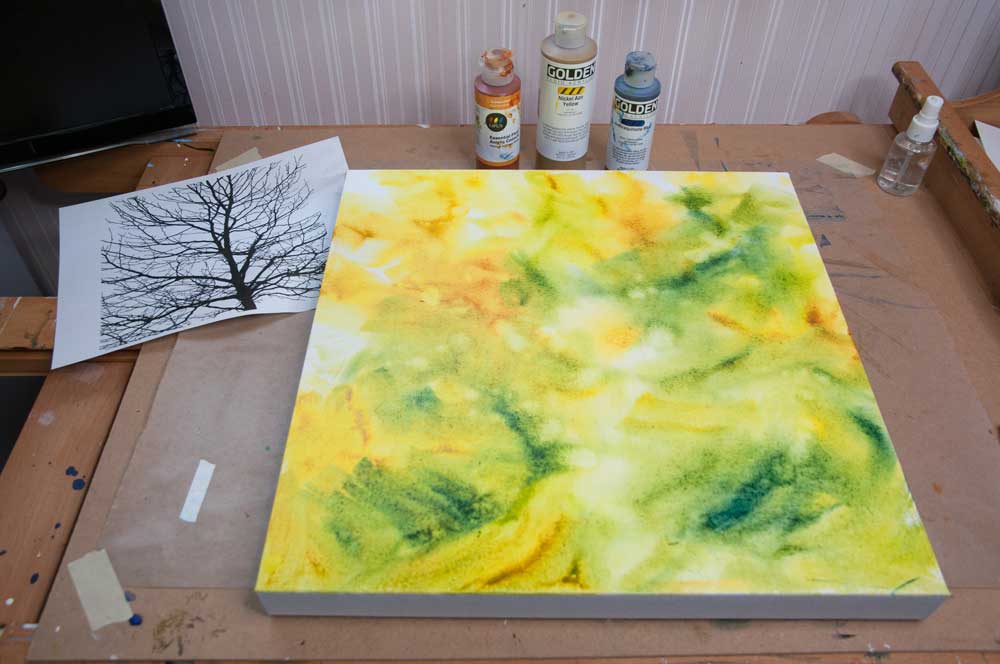 Step 2 - Creating the prints. I used my 8x10 Gelli plate, rolling out mostly Anthraquinone Blue with some Transparent Red Iron Oxide here and there. I placed the stencil on the Gelli plate then I did the 1st pull on tissue, getting into all the crevices. I cleaned off the negative spaces with copy paper. Then I lifted the stencil and printed the ghost on tissue - this is the one I will use for this project. I am hoping that the 1st pulls on tissue will be useful down the road. 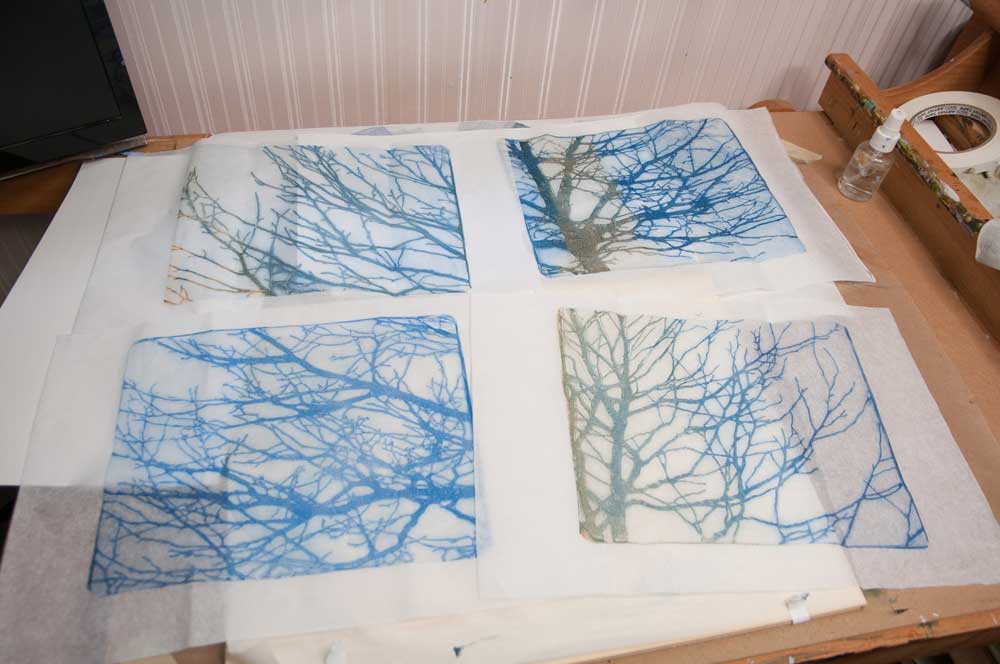 Step 3 - Negatively painting the sky and sky holes on the canvas. Using Cobalt Blue, Titanium White and some heavy gel, I painted the sky, creating the shape of the foliage. I used the stencils as a guide as to where to place the sky holes. 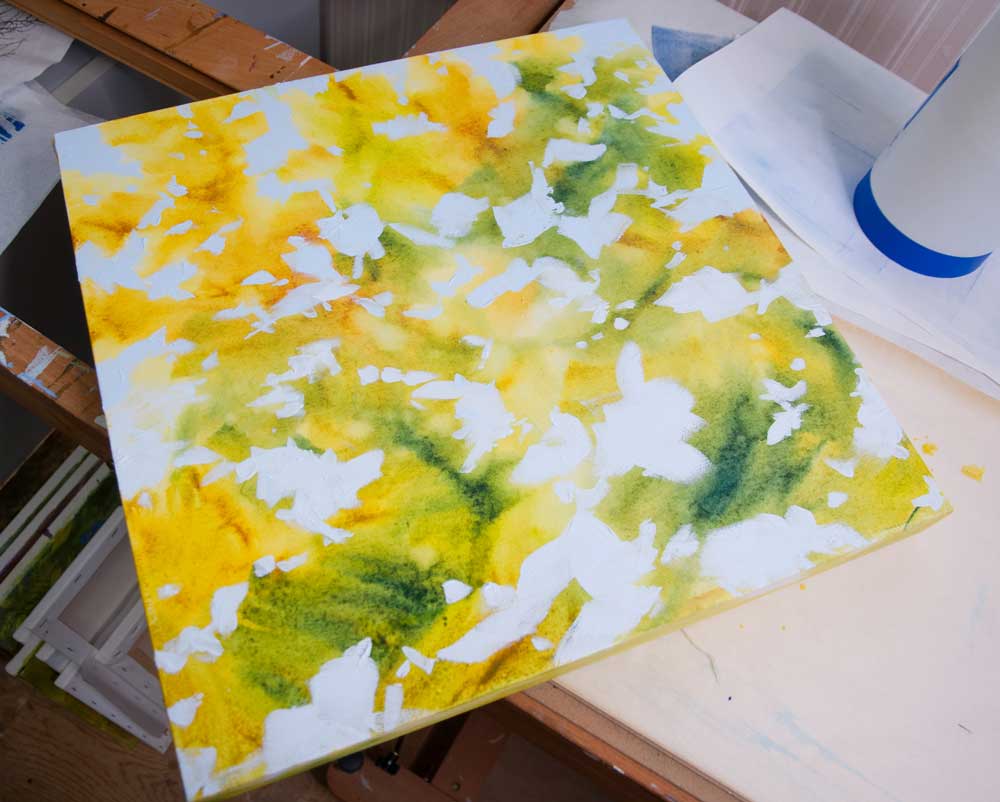 Step 4 - Collaging the prints. I trimmed the excess tissue from the prints, trying to leave a good edge where the prints have to match up. Then I collaged each onto the canvas. I found that you can paint over top of the tissue to adjust composition and repair areas where the collaging process wasn't perfect. 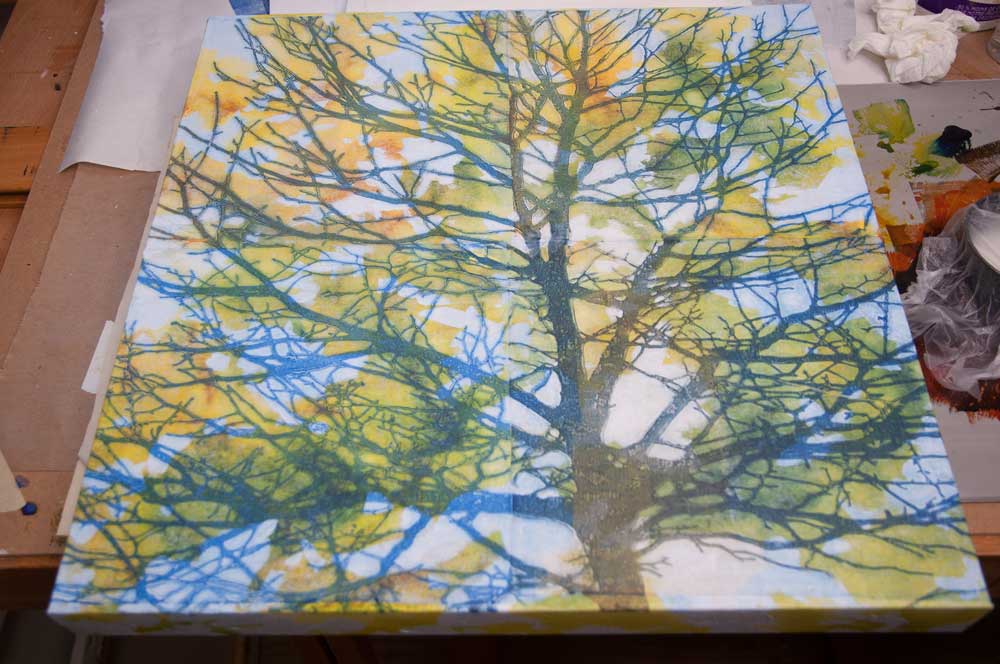 Step 5 - Applying soft gel through the stencils. This enriched the colour of the foliage and created a beautiful surface. The contrast between gloss and matte adds further interest. 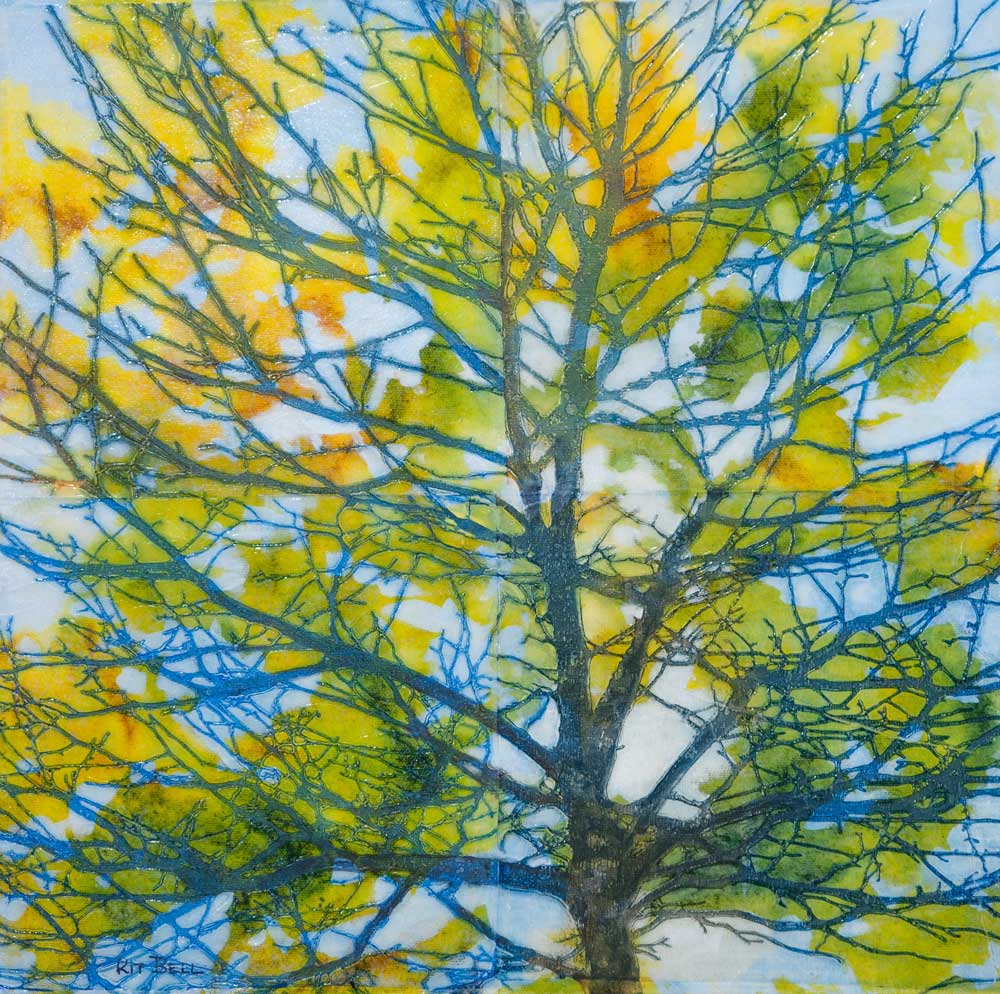 The beauty of creating the four tree stencils is that each individual is interesting on its own. Stay tuned to see what I have created with them!
2 Comments
Michelle Droettboom
4/27/2022 07:50:43 am
Wonderful ideas that so perfectly blend knowledge from all walks of your life! You are so generous to share your process! Can’t wait to see where this takes you! I have documented my art journey for years, initially on paper and the last few years on OneNote. I find a shared journey is more fun and for the most part, I can just copy and paste my notes. The most important thing is that I am back in my studio making art again! Leave a Reply. |
AuthorThe Okanagan provides inspiration wherever you look. I enjoy both painting on location and working in my studio. For more information contact me at [email protected] Archives
November 2023
Categories
All
|
 RSS Feed
Gallery Pages |
Information Pages |