|
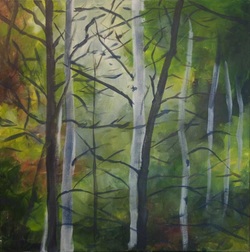
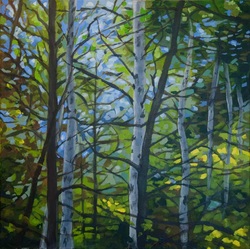
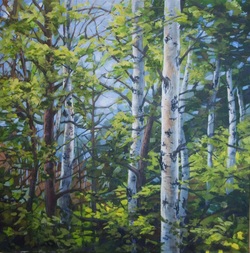
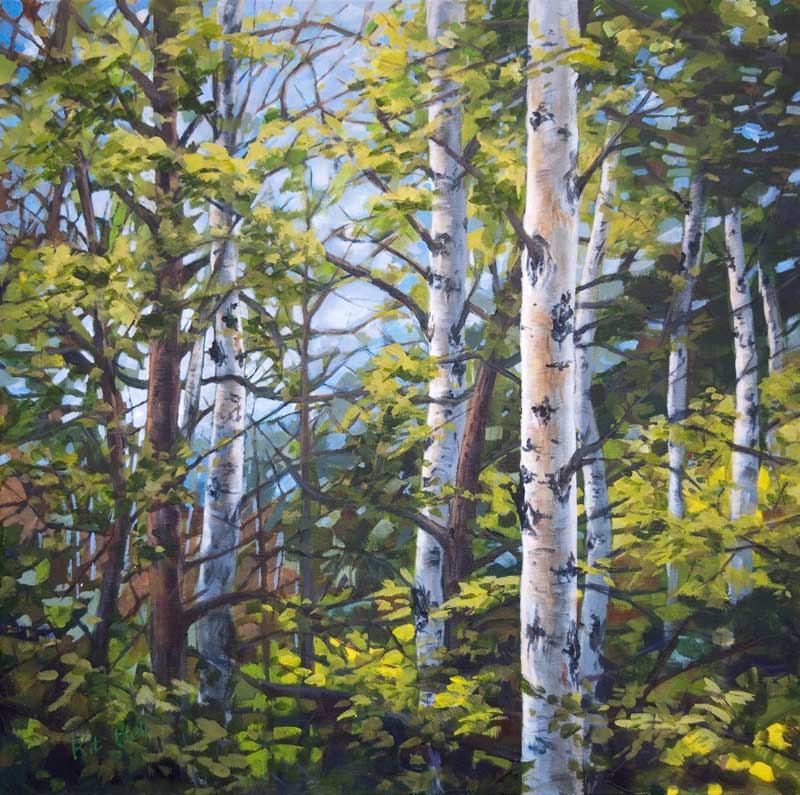
Last fall I joined the Kelowna Painters Studio group, a group of artists that meets every Wednesday to paint and share ideas. Involvement in such a group of artists has been highly beneficial to me and has encouraged me to “spread my wings”, so to speak, as an artist. Several of the artists in the Kelowna Painters Studio start a painting on canvas that has been prepared with black gesso. Working on a dark surface fits right in with the “dark to light” working method of the oil or acrylic painter. You seem to pull out the lights and the brighter colours from the dark surface. I was interested in trying something similar but I am not a fan of black or of a single toned surface for my work, so I decided to take my current method of starting with an underpainting a step further. Rather than going for the local colour in the underpainting I decided to go to a darker colour. And rather than allow the underpainting to become too complex, I decided to go very broad brush with it.  First stage - Underpainting Using the reference material to suggest colours and patterns in the underpainting, I started this canvas with darker cool greens and lighter warm greens with some earth tones and lighter areas (still relatively dark) mixed in. As I brushed on the paint, I tried to allow underpainting to take on its own patterns of warm and cool, light and dark. I set the painting aside for a while to allow shapes and patterns to emerge. Then I went in with more colour, following the shapes of the branches and allowing the colours to break up areas even further. At this stage, I again set the painting aside where I could see it regularly.  Second Stage - developing patterns and colours I decided at this point that I needed to strengthen the pattern of the tree trunks. There were two dark trunks both leaning right that created a distracting movement in the painting. I changed the direction of one and put a foreground light coloured trunk on the right. Much better. Now, I reviewed the photo of the underpainting and worked with this as the reference. I continued to develop the foliage and “sky holes”.  Third Stage - develop the foliage and trunks Now the painting was almost done. I put it in the living room for a week to mull over. I decided I wanted to draw the viewer’s eye toward the trunks on the left as a secondary focal point. As the eye is drawn by increased contrast of lights and darks, I increased the backlight coming through the trees in this area. Below is the finished painting - Mysterious Light, 20" x 20", Acrylic, $350.
3 Comments
Wendy Davidson
3/22/2012 08:34:16 am
Love it, the painting is lovely, helps me remember that summer will be here soon. Thank you also for the decriptive way you told me how it was accomplished. I'm kind of new at painting and need all the help I can get.
Reply
Kit Bell
3/22/2012 03:15:32 pm
Thanks, Wendy! I really enjoyed doing this painting and it definitely makes me feel like summer is just around the corner.
Reply
Leave a Reply. |
AuthorThe Okanagan provides inspiration wherever you look. I enjoy both painting on location and working in my studio. For more information contact me at [email protected] Archives
November 2023
Categories
All
|

 RSS Feed